
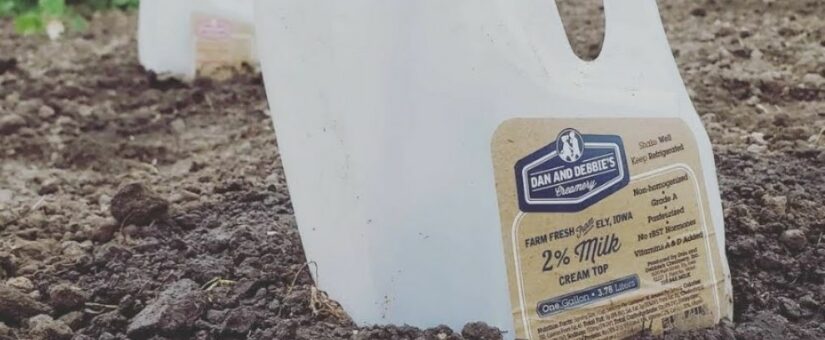
Mini Greenhouses at Home: with Dan and Debbie’s Milk Jugs
Spring is here and you can get a jump start on your backyard garden with at-home mini greenhouses! These fun mini greenhouses are made out of up-cycled Dan and Debbie’s milk jugs and they do wonders!
The jugs give seedlings a head start while our Iowa spring weather fluctuates. You are able to start your seedlings earlier and with more confidence with mini greenhouses! You can start your mini greenhouses as early as March or April with your seedlings, and plant before the final frost date since they are protected by the jugs.
Very little sunlight gets through the milk jugs, but they keep your seedlings warm and safe from the elements while they get their start. These mini greenhouses also keep it green – literally! They keep your seedlings healthy and green while also up-cycling our milk jugs!
You can use these greenhouses to start your seedlings right into the ground or as a container and transplant the seedlings again once you feel more confident – we have directions for both!
Here’s what you will need:
- Empty, clean Dan and Debbie’s milk jugs; gallon works best
- Box Cutter Knife
- Small Ice Pick or Power Drill
- Seeds
- Seed Starter Mix
- 5-gallon Bucket
- Something to stir the mixture with (a paint stick or a hand trowel)
- Small Hand Shovel
- Water
- Permanent Marker & Duct Tape or try this Fade Proof Pen
Make your mini-greenhouse:
- Save and clean milk jugs or water jugs for a few weeks prior to planting. You will need one jug per variety of plant you are growing.
- Cut the top off the milk jugs with a box cutter knife. Leave one side of the top attached, so the jug has a “lid.” I recommend making the cut about 2/3 of the way up the container. If you cut too low you won’t have enough room for the seed starting mix. If you are planting right in the ground, you can skip the following steps and simply place the greenhouse over your seedlings in the ground, like a tent.
- Puncture the bottom of the jug with several small holes for drainage. I used a small ice pick to do this. You could also use a power drill. Anywhere from 6-12 holes per jug is good. Set the jugs aside.
- Next, pour the seed starter mix into the 5-gallon bucket. Add water a little at a time and stir the mixture until all of the seed starter mix is moist (think brownie batter) but not sopping wet or dripping. Be sure to use a seed starter mix and NOT soil from your yard or garden. If you are starting a lot of seeds at once you may need more than one bag of seed starter.
- Transfer the mixture to each jug using the small hand shovel. I suggest filling each jug with at least 2-inches of the mixture to allow room for root growth. Then plant your seeds, one variety per jug, according to the directions on each seed packet. Most packets have a seed starting guide on them. Please note: If the packet recommends direct sow only (such as for carrots) those seeds are best to plant after your frost date and NOT in the milk jug.
- Bend the “lid” back over the jug to close it. Seal each jug with duct tape. Label the jugs with a permanent marker and leave the cap lids off the jugs. I recommend labeling the tape and/or jug in more than one area. Another option I would like to try is this Fade Proof Pen, which is meant to withstand sun, rain and all other elements!
- Place the jugs outside in an area where they will not blow away or be knocked over. This could be in your backyard, on a patio or even a balcony if you live in an apartment.
- Posted by Elizabeth Uthoff
- On March 19, 2024
- 0 Comments
0 Comments