
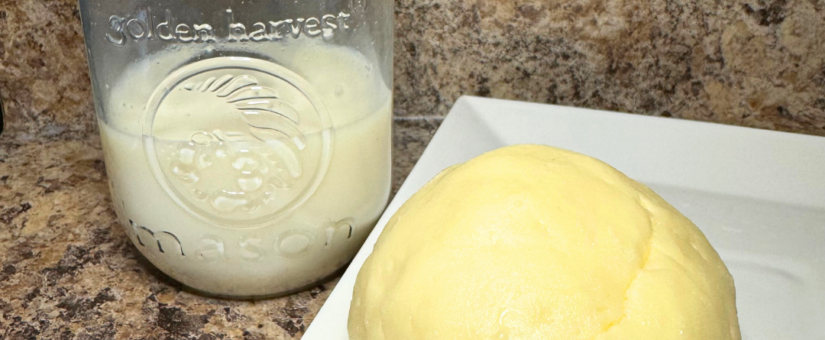
Butter in a Jar
Interested in making your own butter at home? Make butter in a jar with only one ingredient! This is also a super fun and easy activity to do with kids at home! Butter is made when the butterfat solids in cream stick together and form a solid butter, which occurs when cream is agitated. So you can make butter in many different ways – in a butter churn, using a blender or food processor, beating cream with a mixer, or the most fun way, in a jar! The best part of making butter at home is you get to see the stages the cream goes through from cream, to whipped cream, to butter + buttermilk!
Here’s everything you need:
- 1 pint Dan and Debbie’s Heavy Whipping Cream
- Salt; if you want your butter to be salted
- 2 jars with a lids – I use Ball canning jars with a lid, but you could reuse any kind of jar with a lid
- A strainer
- A medium sized mixing bowl
- Ice cold water (I use cold water with a few ice cubes in it)
DIRECTIONS
- Pour your cream into the jar you’ve chosen. Ideally you would want your cream around 60 degrees F before you start making butter. You’ll want to make sure there’s plenty of room for the cream to move around and agitate, so choose a jar that’s roughly two times larger than the amount of cream you are using. If you are doing this with young kids, you may consider diving the cream into smaller jars, so it’s easier to shake. I used a whole pint of whipping cream in a quart sized jar, but that jar would be hard to shake for small hands. If that’s the case, try a pint sized jar!
- Place the lid on the jar and start shaking it up. For a real good time, put on your favorite tunes and have a mini dance party with your butter! It should take roughly 20 minutes of shaking to create the butter – so pick a few good songs!
- As you start to shake the cream will start to become thicker and coat the outside of the jar. When you get the point where you feel like nothing is happening, open the jar – you’ve made whipped cream! This is a great point to stop if you are getting tired and find that you don’t have it in you finish it out today, follow our easy recipe to add sugar and vanilla and boom – you’ve made homemade whipped cream!
- Keep shaking – you are almost there! Very soon that whipped cream will start sloshing around and you will see that there is a lot more liquid in your jar, and a big yellow nugget in there. You’ve successfully made buttermilk and butter! Give it a few more good shakes, to really make the buttermilk release from the butter.
- Next we are going to drain the buttermilk off into another jar. Use your strainer and a funnel if needed to strain your buttermilk off into a separate jar and place a lid on it. You can use this buttermilk to make pancakes, buttermilk cakes, breads, and more! Place your buttermilk in the fridge until you’re ready to use it!
- Now, we are going to place our butter into a medium sized mixing bowl with ice cold water. Rinse the butter in the bowl until the water runs clear, you may have to change out the water a few times. You can also knead the butter to get all the buttermilk out, this will ensure your butter lasts longer.
- Now if you want to add salt to your butter, just add it on top and knead it into your freshly made butter! Store it as you would any other butter in your home.
- Posted by Elizabeth Uthoff
- On March 13, 2024
- 0 Comments

0 Comments